Molds are the last thing you want to have in your home. They are health hazards and do nothing good to the look of a house. Worse, they are hard to remove, especially if your home is already teeming with them.
In such instances, you will have to hire professionals to get rid of your mold problem.
You can avoid all the health concerns and other issues that come with having molds in your home by preventing their growth in the first place. Here are some tips on how to prevent molds in your home:
Identify possible problem areas
It can be hard to have a mold-proof home. But you can start doing this by inspecting all areas of your house and finding out which ones are often damp and wet.
The most common rooms and parts of your home where molds will likely grow are the:
- Bathroom
- Kitchen
- Basement
- Ceiling
If there are leaks, or if these areas are often damp or wet, have the issues fixed immediately to prevent future mold problems.
Make cleaning a priority
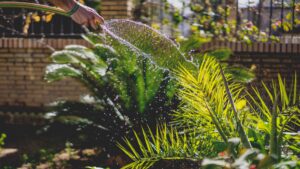
To keep molds at bay, always vacuum and keep your home clean, especially the areas that generate a lot of moisture such as the bathroom and kitchen. Use disinfecting cleaning products on non-porous surfaces such as tiles and stones to discourage mold growth.
De-clutter
When you have a tidy room, your cooling system will have an easier time circulating air. The opposite happens when you have a messy room. This is because clutter obstructs airflow and prevents your HVAC system from circulating air. This, in turn, allows the room to accumulate moisture which encourages mold growth.
As such, get rid of things you don’t need or want anymore. Consider rearranging your furniture as well if they are positioned near vents and grilles, or covering them, to keep air circulating.
Keep your home well-ventilated
Poor ventilation in damp spaces like bathrooms and kitchens can leave moisture behind that can encourage mold growth. As such, wipe the kitchen sink after using it and keep the bathroom door open after bathing to speed up the drying of surfaces.
You can also use fans to ensure proper ventilation in these rooms. However, make sure the fans take moisture outside and not into attics. Our friends at Gilmore Solar, Heating, & Air, recommend searching for an HVAC company near me for professional help.
Handle water leaks and flooding issues immediately
Lastly, have water leaks in your roof, windows or any other part of the home repaired by experts as soon as possible. Keep in mind that constant leaks cause moisture to build up and enable molds to grow.
If you encounter any flooding problem in your home, make sure you have this issue fixed immediately. Thoroughly wash, disinfect and dry soaked carpets, padding, and wet upholstery before using them again. Contact Tureks Plumbing Services if you need assistance.